News 
Joining alongside such other media tie-ins of popular iOS games such as Angry Birds Rio, Puss n Boots Fruit Ninja, and Temple Run: Brave, Where’s My Perry? puts a fresh coat of Phineas and Ferb paint onto the popular Disney Mobile title, Where’s My Water? Just like in Where’s My Water, gameplay consists primarily of using your finger to break away the dirt that fills the level, creating pathways to guide the water to an opening, allowing Agent P to continue on his way. A secondary objective in each level is to guide the water to also collect the three stars, or in this game, lawn gnomes.
Publisher: Disney
Date: 26th of June, 2012
Where’s My Perry is more than a re-branded version of Where’s My Water. Where’s My Perry, the new physics-based puzzle app. Even if you wont admit your secret love for Phineas and Ferb, you will surely disclose your soft spot for the extraordinary platypus Agent P! How can you not fall for the lovable Agent P? He is saving the world in style as he rocks his fedora better than any other semi-aquatic creature.
This is the guideline to Where’s My Perry? which is the developer to the original Where’s My Water? Game.
PLAY WHERE'S MY WATER?
You may play Where's My Water? by clicking HERE.
PLAY AGENT PERRY GAME!
You may control agent perry in he adventure game. Agent Perry Strikes back!
PLAY OTHER PHYSICS GAME!
"Where's My Perry?" is really one of the most excellent Physics Game! You may want to play our other Physics Games from HERE! Cut The Rope, Where's My Water, Feed The Panda, Angry Penguins, Angry Birds, Gravity Duck, Fragger, Balloons Mail and so on...
So, Where's Our Perry?
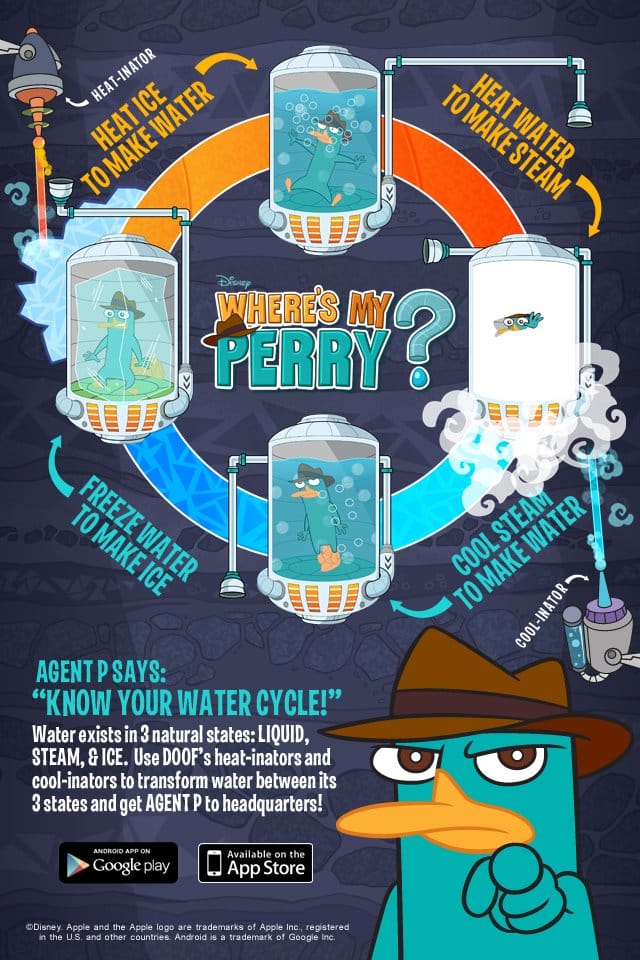
Your task in Where’s My Perry is to help Agent P escape from his transportation tubes so he can tackle his next secret mission. Use the lasers planted throughout your path to create different forms of water including liquid, ice, and steam, to power the tubes and help Agent P be the best spy he can be! Don’t forget to collect all three gnomes in each level to unlock other Where’s My Perry levels.
 Games2Live's guide and tips presents you guideline, images, tips, and hints on how to enjoy your game.
Let's see the official teaser trailer first;
Than let's see the walkthrough;
 Pre Game...
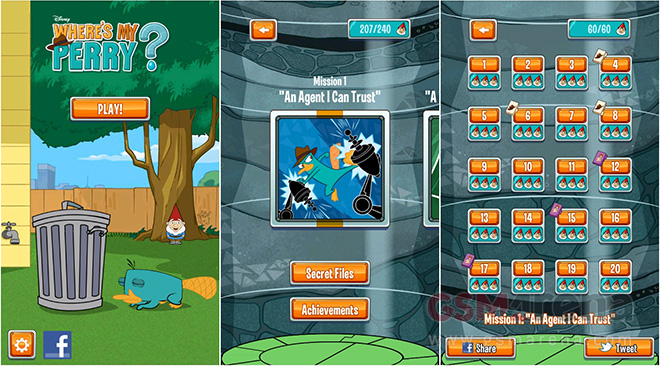
To get started, go ahead and click the “Play!†option near the top of the screen. Upon doing so, you’ll arrive at a menu that features three options: Begin the game, download Where’s My Water?, or gift the game to a friend. If you choose the play option, you’ll immediately arrive at the first level of the game.
More Disney - If you’re interested in seeing what else Disney Mobile has released, you can choose the “More Disney†button on the main menu.
In the settings menu there is a gear icon on the bottom left of the screen for adjusting audio and subtitle, change the language, view the game’s credits, edit your profile, or restore purchases.
Facebook - By clicking the Facebook icon at the bottom of the screen, you’ll be taken to the official page for Where’s My Water?
Achievements - To view the game’s achievements, go to the level selection area and choose the bottom button labeled “Achievementsâ€
Now that we’ve taken a look at the game’s menus, let’s dive into the gameplay.
From Here to There: The ultimate goal of the game is to lead water from one area of the level to another. Doing so requires you to drag your finger across the screen to create a path through the dirt.

Gnomes - Every level contains three gnomes. Picking all of them up isn’t crucial to winning, but later levels require a certain amount before they’ll unlock. Although most of them can be attained by hitting them with water, certain ones require contact with steam (more on that later).
Secret Files - Certain levels contain hidden files for you to uncover. If you gather three in a mission (each mission is 20 levels), you’ll be provided a hidden level. You can view how many you have by tapping the “Secret Files†button at the bottom of the level selection screen.
Crazy-inators - After completing a few levels, you’ll be introduced to “Crazy-inators.†These contraptions have the ability to convert water into steam and ice, and vice versa. This is important, because they’re frequently necessary to beat levels in the game. If you’re unsure how to get the water where it needs to be, try searching the level for a Crazy-inator. Just watch out for the ones that turn your water into useless confetti.
Sludge - Some levels contain a viscous, purple substance that will cause you to fail the level if it makes contact with where your water is supposed to end up. That said, it can also be used to cover gaps and help lead your water to its goal.

Lava - In some of the later levels, you’ll encounter lava. Like sludge, it will end the level if it reaches the final destination of your water. On the more useful side of things, it can also turn water into steam.
Progression – Gnomes are a critical part of moving forward in the game. The second set of levels costs 40 gnomes to access; the third costs 85; the fourth costs 135.
More On the Way - As revealed in the level selection menu, the game will be updated with free content in the future.
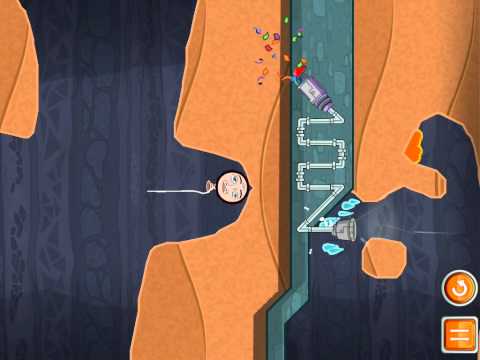
As stated earlier, uncovering secret files can lead to hidden levels. In these levels, you’ll be in control of the Phineas and Ferb character Balloony.
Short of the digging mechanic, these levels are largely different from the game’s main offering. Ballooney is ascending, and you must dig away the dirt that’s in his way.
Obstacles - Obstacles like briar will occasionally show up, contact with which will result in having to restart the level.
Once you go far enough up, you’ll approach a large tube that sucks up Balloony. That’s the end of the level!
Try to be be careful for Crazy-inators. Don’t accidentally lead all of your water to the confetti one.
Use the Restarting the level is as easy as to take advantage.
Try to Start digging when yo see a question mark near the top left of the screen during the level, it means there’s a Secret File hidden somewhere.
If the gnomes come in contact with black sludge or lava, they’ll immediately disappear.
If you don’t have enough gnomes to make it to the next mission, return to the first mission and pick up some of the easier gnomes.
If a secret file is in a level, try digging away all of the dirt to find it, and then restart the level with the knowledge of where it’s at.
If you’re being subjected to a cutscene you’ve already viewed, a double tap on the screen will skip it.
Some levels start with water immediately flowing like crazy. To give yourself some extra time to think, dig a pit for the water to rest in.

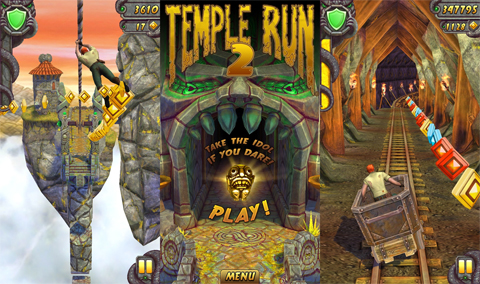
This quick start tips, tricks, hints, cheats and strategies guide to Temple Run 2 at iOS and Android will provide you with detailed images, tips, information, and hints on how to play your best game.
Temple Run 2 is a brand new, massively popular mobile game, and is the sequel to Temple Run, the game that originally dethroned Angry Birds as the most popular game in the entire app store. It’s more of what you loved from the original Temple Run, except prettier, with more characters, more power ups and more challenges. In other words, it’s going to appeal to everyone who loved the first Temple Run and who still loves it. Read on for some tips and tricks for Temple Run 2!

After you finish up the tutorial, one of the biggest obstacles to look out for is when you run right up to an open edge, with no fences. It looks like it should be something where you can jump and catch the rope; however, there’s no rope to catch. Always remember that this is an area with a turn, so be prepared for it when you come up to it, because it’s the single easiest way to die in this game.

PREVIEW
 Temple Run 2 is upon us and now available for Android too-what little we know about becoming successful at the endless running coin-a-thon is now written down to help you to get the best Temple Run 2 score with these hints, tips and secrets Use your Special Power Each of the three unlock-able characters has a special power that you can activate multiple times. Guy's is naturally the weakest Temple Run 2 special power but the other characters can give you a massive score boost. An awesome new feature is that once the powers are unlocked you can trade them between characters. Finding and using the best Temple Run 2 Multiplier it's no secret that using the multiplier is your best bet for getting a high score. Each one you do boosts your multiplier by one. "So definitely focus on getting those done if you want to score really high," says the developer. You should look to Focus on coin. Temple Run 2 is a brand new, massively popular mobile game, and is the sequel to Temple Run, the game that originally dethroned Angry Birds as the most popular game in the entire app store. It’s more of what you loved from the original Temple Run, except prettier, with more characters, more power ups and more challenges.
In other words, it’s going to appeal to everyone who loved the first Temple Run and who still loves it. Read on for some tips and tricks for Temple Run 2!
After you finish up the tutorial, one of the biggest obstacles to look out for is when you run right up to an open edge, with no fences. It looks like it should be something where you can jump and catch the rope; however, there’s no rope to catch. Always remember that this is an area with a turn, so be prepared for it when you come up to it, because it’s the single easiest way to die in this game.
The first power ups you should go for are the ones that increase the value of the coins that you pick up after a certain distance. Upgrade the coin value power up to level 2, which means that double coins start appearing after 1,000 meters. Save up a large amount of coins so that you can power up all the way to the fifth level before you buy another upgrade, because if you upgrade to level three (triple coins after 3,000 meters), you’ll only have double coins thrown in between 1,000 meters and 3,000 meters, which is more of a distance than most people can survive.
You can pick up more gems every so often because they will appear as pickups. Upgrade the “pickup spawn†to cause all pickups to appear more often, thereby causing the extra gems, by association, to appear more often.
There are a number of extra characters that you can unlock, but each one of them performs exactly the same as the last one, therefore, there’s no performance boost to upgrading characters.
Shield: The shield ‘helps protect you from obstacles.’ Once activated, for the duration of time that you are encircled with a green glow, you will be immune to any of the obstacles.
Hitting an obstacle will destroy the shield.
The shield does not aid you when turning corners and will not protect you from falling down gaps or off ledges. Upgrading your shield will make it last longer but it still only gives you that one fail-safe! In the top left corner of the screen is your “shield†meter. One of the elements of the game is that as you collect the coins (more on those shortly) during your run, your shield meter increases. From there, you can double tap the screen and activate a shield that will protect you from most of the obstacles in the game—the exception being it will not save you from falling off the plain of play. These are not terribly common in comparison to other obstacles, so the shield is fairly useful in getting you further in the game and increasing your score.

Score and Movement: In the top right corner of the screen is the score meter. The score will automatically increase as you move along in the game, and grabbing coins will increase your score substantially as well. Bonus score; once this powerup is activated you will get an instant 500 point bonus (points, not coins!) To get this powerup you will need to get the character Karma Lee costing 25,000.
Coins: Scattered liberally throughout your run are coins. In the top right corner of the screen just under the high score is your coin count during the run. The coins will be on the right hand, middle, or left hand side. Grabbing them is a matter of using the accelerometer.
There are common obstacles that you will encounter in the game. You have four swipe options you can swipe up to jump, down to slide, and then left or right to turn when your path runs out. In this case, you can only slide under to progress there are a few that you can either slide or jump over (fire comes to mind), and all of the obstacles are fairly straightforward and logical in what you need to do. Accelerometer is the last control scheme in Temple Run 2’s accelerometer support. It is fairly basic, as you move your phone around to go from left to right to collect coins, or further in your run where you cart ride.
Cart Riding: When you get a bit further in your run, you’ll encounter a cart that you’ll hop in and ride along the rails. You’ll have similar obstacles as when you’re running, meaning you’ll have to jump or duck under obstacles. The only wrinkle to this cart is the part where you have to use the accelerometer to curve around bends. It’s somewhat tricky to navigate, actually, as on the curves it might take you a bit to realize that you should not completely tilt your phone. If you do, you’ll fall off the rails. Instead, just slightly tilt the phone and you’ll be fine.
Levels and Abilities: Levels are another new addition to the game and are called either levels or objectives interchangeably throughout the game menus.Each level has a green status bar that increases as you complete the required objectives listed below.

Each objective needs to be completed at the time it is displayed on the menu for it to be accepted. So for example, ‘running 250m without collecting any coins’ will not be of any benefit to you unless that particular objective is displayed. Once the green status bar reaches the end you are automatically upgraded thus enabling more abilities and upgrades. Another word for them might be challenges. Abilities are slightly different to the powerups. The powerups let you decide what added ability you want available to you throughout the game, activated by double tapping. An ability on the other hand alters the game settings so that regardless of what powerup you have, you can still increase your score/ coin count quicker. Most are self explanatory by reading the small information written below each one. As you complete runs, you’ll level up your character and get various bonuses. There isn’t really anything to the levels outside of the bonuses, but they can be used for other upgrades that can actually support you in the game. As you run through the game and collect coins, you’ll earn enough to upgrade these various abilities.
These will allow you to get further along in the game, boost your score and get more coins to get further upgrades. In order to gain levels, you have to complete the missions that are given to you. You get three missions at a time, such as collecting a certain amount of coins, running a certain distance, running a certain distance without collecting coins, etc. Each mission that you complete increases your experience point bar. As soon as that bar fills up, you will gain an experience level. As previously noted, you can unlock the ability to buy certain power ups based on what experience level you’re at, but more importantly, you will gain a large coin bonus for gaining an experience level.

Ape and "Save me!": If you swipe to the right or the left too early, you’ll bump into the sides of the level and it will spawn in this giant ape to run behind you. If you hit any other obstacles, the ape will grab you and eat you for dinner—so don’t do that. It’s fairly easy to not have your run ended by the ape, unless, of course, you’re trying to take screenshots of the game for your dedicated readers! Each time you die you have the option to use the “save meâ€, which is essentially a new lease on life. There is no point decrease for using the save me, but it will cost you gems that can be collected throughout your run, or purchased for money. Each time you die increases the gems you have to use to continue (1, 2, 4, and so on for each death). The “Save Me†is the chance to recover after you have already died, and it costs one gem to do the first time, two gems the second time, four gems the third time, eight gems the fourth time, etc. Buying the save me boost will decrease the price by one gem, unless the price is already one gem.

The head start boost will decrease the price of a head start power up, while the score multiplier will add one to the multiplier – 2x, 3x, 4x, 5x and 6x. An other words, ‘Save me’ is a feature whereby once you die you can spend gems to have another go starting from the point at which you die. Spending coins on this ability will reduce the number of gems required each time to save yourself. It is an expensive ability but for what it does you could argue it is essential, especially to those going for high scores!
You can buy an instant shield, or an instant boost, a coin magnet or even an instant gem bonus. The instant gem bonus gives you 2 gems right out of the gate. You can also get an instant 50 coin bonus, or you can buy an instant 500 point bonus to your score, which is an almost completely worthless power up seeing
as how quickly your score increases when you run. The shield has already been mentioned earlier in the guide, coin magnets allow you to pick up every coin for a set period of time without running over it directly, and then distance boost that will leapfrog you forward a good chunk of meters.
Upgrades or Bust: You’re not going to get a high score to make a dent in your friend’s leader boards if you don’t upgrade your abilities. Make sure that you focus on the coin upgrades first and foremost, then make sure that you focus on score multiplier increases, then pickup spawns. From there, it doesn’t really matter.
Reaction Time and Sitting Position: At the later stages of this game, the game speed really picks up and it really comes down to your ability to react. Ideally, you’ll be sitting when you’re playing this game, or sitting on your stomach. Lying on your back while playing the game messes with the accelerometer. Sad but true.
Now be ready to fall into in the Temple Run 2 with light of this guide and hints guideline, than be a master of the ancient forest! Run!
You can try to play other flash games in GameTale.net, and please do not forget "each game is new life for a Player!"
Welcome to our new arcade website built with AV Arcade!
Top Players
 gamemaster (72260 points)
 dustint916 (513 points)
Luffy311 (475 points)
- blanziflor (342 points)
- soccer_fun (326 points)
- tankzrule (318 points)
- mithilgupta (317 points)
- issameddine (308 points)
- lcsheik (300 points)
AnTiTo (272 points)
Popular Games
Your Favourites
Log-in to save favourites